Updated (originally published )
Working with the Payment Request API
Update: This post originally used the
basic-cardpayment method, which let the browser collect card details itself. Chrome deprecatedbasic-cardand removed it entirely in version 100 (March 2022), so the original examples no longer work. I’ve rewritten the post to use a URL-based payment method (Google Pay) and brought the browser support and spec details up to date.
One of things that irks me about the usability of shopping online is the inconsistent checkout experience between different merchants. Do I really need to enter the same delivery/billing address, card number, CVC code etc. into every websites specific form? Sure, browsers have an autofill feature to help but forms themselves can be structured differently and I find myself having to correct these details a lot of the time. Plus if I have to go through this experience on my mobile device it can be even more frustrating due to slow connections and poor responsive UX.
What is the Payment Request API?
The Payment Request API is a W3C Recommendation (it reached full Recommendation status in September 2022) for a consistent checkout experience by standardising the checkout procedure. It’s there to act as an intermediary between users, sellers and payment methods. The API doesn’t process the payment itself; it gathers the user’s choice of payment app (Google Pay, Apple Pay and so on) and hands you back a response to pass to your payment processor. It also has a consistent UI. Basically, it makes the checkout procedure much easier.
Here’s how the modal looks in Chrome:
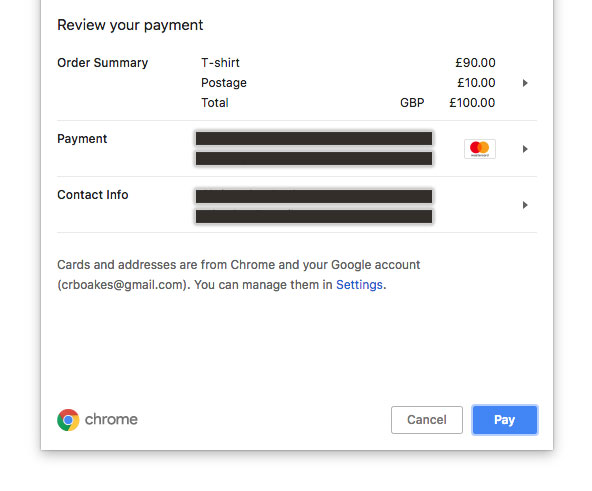
(This screenshot shows the old basic-card UI where Chrome collected the card details directly. That’s gone now; today the sheet shows whichever payment apps you have set up, such as Google Pay.)
Using the Payment Request API
It’s supported in Chrome, Edge and Safari, though with a couple of caveats: Safari only supports Apple Pay through it, and Chrome is currently the only browser that supports third-party payment methods like Google Pay. Annoyingly, Firefox still hasn’t shipped it; its implementation has sat disabled by default for years. Therefore we’ll need to check if the browser supports it which can easily be done:
if (window.PaymentRequest) {

} else {
	// Fallback code here
}
Inside this conditional, let’s set a few variables. Firstly, we need to say which payment methods we accept. Payment methods are identified by URL these days (for example https://google.com/pay for Google Pay and https://apple.com/apple-pay for Apple Pay); the old standardised basic-card identifier was removed from Chrome in version 100. Each method takes a data object whose shape is defined by the payment provider. Here’s Google Pay:
const supportedPaymentMethods = [{
    supportedMethods: 'https://google.com/pay',
    data: {
        environment: 'TEST',
        apiVersion: 2,
        apiVersionMinor: 0,
        merchantInfo: {
            merchantName: 'Example Merchant'
        },
        allowedPaymentMethods: [{
            type: 'CARD',
            parameters: {
                allowedAuthMethods: ['PAN_ONLY', 'CRYPTOGRAM_3DS'],
                allowedCardNetworks: ['VISA', 'MASTERCARD']
            },
            tokenizationSpecification: {
                type: 'PAYMENT_GATEWAY',
                parameters: {
                    gateway: 'example',
                    gatewayMerchantId: 'exampleGatewayMerchantId'
                }
            }
        }]
    }
}]
Note that supportedMethods is a single string now, not an array (the array form was deprecated a long time ago). The contents of data are specific to Google Pay; the Google Pay PaymentRequest tutorial explains each field.
Now let’s add some dummy checkout details:
const checkoutDetails = {
    total: {
        label: 'Total',
        amount: {
            currency: 'GBP',
            value: '100.00'
        }
    },
	displayItems: [
	    {
	        label: 'T-shirt',
	        amount: {
	            currency: 'GBP',
	            value: '90.00'
	        }
	    },
	    {
	        label: 'Postage',
	        amount: {
	            currency: 'GBP',
	            value: '10.00'
	        }
	    }
	]
}
We can also require some information from the user:
const options = {
	requestPayerName: true,
	requestPayerEmail: true
}
Finally, let’s bind these to the PaymentRequest:
let pay = new PaymentRequest(
    supportedPaymentMethods,
    checkoutDetails,
    options
)
Now we need to set up a function to handle the request to use the PaymentRequest API:
async function makePayment() {
	const canPay = await pay.canMakePayment()

	if (canPay) {
		try {
			const paymentResponse = await pay.show()
			sendPayment(paymentResponse)
		} catch (err) {
			console.log('ERROR', err)
		}
	} else {
		throw new Error('Sorry, we cannot make the payment right now.')
	}
}
Firstly we check to see if the browser can make the payment, if not we’ll throw an error (feel free to handle this gracefully). Note that canMakePayment() returns a promise, so we need to await it; it only tells us the browser supports one of our payment methods, not that the user actually has a card or wallet set up. Chrome also has a stricter hasEnrolledInstrument() method for that, but it never made it into the final spec and no other browser implements it. If we can pay, we’ll initiate the browser’s payment modal with show(). A couple of things worth knowing about show(): it has to be called from a user gesture (a click is fine, which is what we’re doing below), and it optionally accepts a promise that resolves with updated details if you need to fetch the final price from your server. If all was successful we’ll call a method to send our payment.
function sendPayment(paymentResponse) {
	console.log(paymentResponse)
	paymentResponse.complete('success')
}
Calling complete() tells the browser the payment has been processed and closes the payment sheet.
It’s at this juncture you’d hand over the payment data to whichever payment processor you like. In practice, most processors now wrap all of this up for you; for example Stripe’s Express Checkout Element uses the Payment Request API under the hood to surface Google Pay and Apple Pay buttons.
Now all we need to do is bind this functionality to something which, for the purposes of this demonstration, will be on the click of a button:
<button class="js-pay">Pay For Something</button>Let’s create a method to initialise our click event:
function initPayment() {
	document.querySelector('.js-pay').onclick = (e) => {
		e.preventDefault()
		makePayment()
	}
}
And now let’s call this method after we’ve assigned the PaymentRequest to a variable:
initPayment();Conclusion
This is a very basic implementation (I originally had a Codepen demo to go with this post, but it used basic-card so it no longer runs). You can read the full spec here and there’s a comprehensive overview on web.dev which you can read here. If you’re curious how payment apps like Google Pay plug into the browser in the first place, that’s the job of the companion Payment Handler API, which lets web-based payment apps register themselves as payment methods (Chromium-only at the time of writing).